Welcome to the journey,the tale and the saga of our
Homestead.

Saturday, February 27, 2010

Plumb Blossom scented air

House-wrenImage by Lip Kee via Flickr

This morning as I went out out to check in with the hens I noticed something,the air had changed.I no longer smelled wood smoke and the air was no longer the quiet sleeping air of winter.The air was filled with the scent of plumb blossoms and the voices of all of the birds that have returned.
The littlest harold of spring, the little tiny house wren who comes every year to nest in our bird houses along the back fence.For a tiny fellow he has one big voice and a curiosity that could get him killed by a cat.
Spring it smells like plumb blossoms and sounds like the little wren.Welcome spring.

Rois
Reblog this post [with Zemanta]

Thursday, February 25, 2010

Seven Minute Frosting

A reader left a comment wanting more information about "the" frosting.I am hoping it was the Seven Minuet frosting they were wanting because it is the only frosting I have an actual recipe for.When I make a Butter Cream type it is all just a bit of butter,powdered sugar and what ever I am flavoring it with,no measurements.

My recipe is from one of my vintage baking books that has lost its cover and title page so I can not be honest and give the title as I should.None the less here it is.

Seven Minute Frosting-

2 Egg Whites
1 1/2 Cups Granulated Sugar
1/2 Cup Water*
1 Tablespoon White Corn Syrup (that much is not going to kill you.)
1/2 teaspoon Salt
1 teaspoon Vanilla Extract **

Combine egg whites,sugar,water,corn syrup and salt in a double-boiler top. With an electric mixer at high speed,beat about 1 minute to blend;then place over rapidly boiling water and beat till mixture holds a peak when beater is raised.(don't be surprised if it take longer than 7 minuets.) Remove from boiling water.(For smoothest frosting,empty into a large bowl.) Add vanilla and continue to beat till mixture is stiff enough to spread.
Fills and frosts top and sides of:
2- 8 or 9 inch layers
or
8x8x2 or 9x9x2

* For crusty surface reduce water to 1/3 Cup

** Flavor Variations-
Chocolate- fold in 2-3 squares of melted unsweetened chocolate
Harvest Moon- Sub 1 1/2 Cups Brown Sugar for Granulated
Peppermint- Sub 1/4 teaspoon Peppermint extract for vanilla and add in 6- 5 inch
peppermint sticks crushed. Or a handful of the small round peppermints crushed.

A couple of times I had this recipe not work to well,I assume it had something to do with the humidity.Like I mentioned in my last posting the frosting comes out kind of like soft Marshmallow Cream and dose not crust or dry out. It is not as stiff as Meringue. Be careful when frosting your cake, if you over fill it the layers will slide.

My brother loved the chocolate cake with the peppermint seven minuet frosting and always had it for his birthday cake.The year he turned 12 my parents got him a dog for his birthday,we named the dog Sam. After we brought Sam home on my brothers birthday, we had birthday cake for my brother.There was just the 4 of us so half of the cake was left at bedtime. Bedtime also brought up where to put the new dog for the night.My Mom worried about chewing or peeing on the carpeting,the dog was an unknown factor so I can't blame her.Her solution was to shut Sam in the kitchen for the night in the big butlers pantry,not much to chew and a floor that could be mopped. No one thought about the cake sitting on the counter smelling like heaven to a dog with a sweet tooth.In the night Sam got the cake down and ate every single lick of it and then puked it all up,good thing the floor was mop-able. That was the beginning of our education of life with Sam,Sam LOVED sweets. I was only 4 at the time and still short,I had to learn that any time I had a treat that was not eaten at the table, I had to raise my hand holding the treat as high as I could.Why? Well Sam had a talent for sneaking up behind you and gently but swiftly snatching your goody. He really was a good dog we named him for Frodo's Sam with the hopes the dog would be as faithful as the other Sam and he was,he just had to have his sweets.Fitting I'd say,those Hobbits and their meals and all that.

Well "L" I hope that was what you were asking about.If not post a comment again and it will motivate me to measure out a batch of Butter Cream Frosting.
I ended up not baking a cake today.There was a break in the weather and this time of year we have to use those days to their fullest.We planted 3 Blueberries and 1 Italian Prune tree today.The start to filling in our empty front with garden beds.The next 2 days I'll be working and hope to bake a cake soon,I am craving cake badly and just need to get that need filled.
Rois

Wednesday, February 24, 2010

Chocolate Cake

This posting is dedicated to both Margaret and Rachel. I raise my fork to you and your love of chocolate cake.


On my to do list for tomorrow is to bake some sort of cake for home. I have not picked which kind yet but I thought I'd share with all of you my families most favorite chocolate cake.My Aunt started baking this cake forever ago and it is now what the extended family expects when chocolate cake is on the menu. This cake is great with whatever kind of frosting or icing you may like.We are overly fond of peppermint flavored seven minute frosting slathered on and sprinkled with crushed bits of peppermint candies. Seven minute frosting is a rare treat here,it involves egg whites and like meringue is fussy about humidity,remember we live in wet Oregon so it dose not always turn out.But the marshmallow cream likeness is a slice of heaven. Chocolate Ganache is great too. MMM

Chocolate how could one go wrong? So here is the recipe which came from the back of the Hershey's Baking Chocolate box that my Aunt had and then passed on to me.The recipe that is currently on the box is not the same and in my opinion not as good.

Hershey's Chocolate Cake-

Preheat the oven to 350

Mix in the following in order:

1 3/4 Cups Flour
2 Cups Sugar
3/4 Cup Baking Cocoa
1 1/2 teaspoon Baking Powder
1 teaspoon Salt
2 Eggs
1 Cup Milk
1/2 Cup Veg Oil
2 teaspoons Vanilla

Once you have the above all mixed together add to it.

1 Cup Boiling Water I turn on the kettle as I start to mix the batter by the time I need the water it is boiling.

Makes: 1-9x13 cake
2- 9 inch cakes
3-8 inch cakes
Or about 24 cupcakes.If you are packing these in a lunch box send two,the cupcakes have
amazing trading power at lunch time.
For the cakes bake for 30-40 minuets.If you touch the top of the cake to check for done-ness the top will seem moist and stick to your finger tip.Try the straw test to check for done-ness instead.
For the cupcakes it is about 10 minutes baking time.

Happy baking.
Rois

Tuesday, February 23, 2010

Keeping Chicks

A day-old chickImage via Wikipedia

Spring is around the corner and the feed stores are filling up with sweet little peeps coming from brooders full of chicks. At work our brooders are full and it has been dang hard not to scoop up every single chick we get in.If we lived on land and not in the city I'd have two big flocks of chickens one for laying and one that was all of the amazing breeds out there that I would have just for their looks. I have resisted so far but probably not for long.

Not for long for a couple of reasons,the first I can't not bring some home, the urge is like an addiction that I keep at bay by my strong sense of common sense and the second is our 2 older hens are no longer laying. But you see the second reason gives me room to feed my need for chicks.

The second reason is also something people have to realize before they start having chickens,what to do with the hens once they have stopped laying? Here we will butcher the hens and have them for soup,not everyone's cup of soup but it is our solution.Sometimes a person lucks out,sort of, and their older hens die on their own before you have to think of this problem.And there is always some city-fied critter eying your coop like a 24 hour drive thru to take care of this point too.

Having Chickens is a long term commitment..period,end of story. They are like having any other animal that you bring into your life.They need care,food,shelter and protection.Chicks are darling little puffs of sweetness for the first few days and then it all begins to change.Just like that sweet little baby you brought home from the hospital grows into a cranky teen but faster. Fortunately Chicks won't argue with you about every little thing, demand more cell phone minutes and another pair of shoes .

Once you have chosen the breed of Chicks you want you are going to need to set up your brooder before you bring chicks home.Having things all set up and ready to go will make for an easier transition for the chicks and make things simple for you. You will need a large box of some sort that is about 3 feet long.You can ask at your local stores that carry appliances if you want to use a cardboard box. Otherwise good luck on finding one made from something else.Also for the box you will need some sort of screen for over the top so the light can get in,no other pets can get in and the chicks can't later fly out which they will try. You will also need some pine shavings for in the bottom of the box, be sure it is PINE not cedar,the oils in the cedar are not good for the chicks. You will also need a feeder and a water.You can find these at feed stores.Don't feel you have to buy the jars for both of these you can use any narrow mouthed canning jars instead. And most of important is a Brooder light to hang over one end of the box to keep your babies warm. Growing up my parents used a high watted light bulb and a hanging light,nothing fancy at all, it works it is a choice.You can also find Brooder Lights with a shield to focus the light a bit more,these use a larger bulb that are found near the lights at feed stores. You will need to be able to hang you light above the box towards one end.This allows the chicks to move in and out of the heat of the light.

You will also need some Chick feed.There is specific feed for chicks that they eat for the first 3 months.This feed comes medicated or not.I always buy the medicated. Why? Because it's like getting my kids their shots but in some ways better.The medicated feed protects the chicks from some diseases that are naturally in the soil ,don't panic here,these are things that effect chickens not your family. The other up side to me about the medicated feed is by the time the chicks will be laying the medication has worked its way through the birds body.This means that if your goal is to have your own organic eggs you will have them any way.

Everything is set up and you have brought home your chicks.What is it like to have them around? That depends on where you end up keeping them.We keep ours in the dinning room (No comments from the Peanut Gallery. Hey, the first person to leave me a comment about the origin of that phrase will win a prize.) and then later move them to the garage. The chicks need to be some place safe,draft free and dry.The box is big so finding a spot is interesting and a trail of patience in the end.
*** I just want to add here about how much this could cost you.When people come in to buy chicks and the set up things it runs for 4 chicks and the "kit" right around $70. I know that may seem like a lot but I have two solutions.Shop around for your supplies.And think of it this way it is an investment that will last about 2 years. It all evens out once the hens start to lay.

I like having the chicks near by so we can talk to them.I find by talking to them they seem to bond a bit more with us. Besides that it gets us in the habit of checking their food and water often.We can also keep an ear out for any stressed out peeping.And well they are so cute we spend lots of time just watching them go about their days. Eventually the charm wears off and everything is covered in dust and out to the garage they go.

This is usually around 3 weeks.The chicks have grown and started feather out. They are also bigger,scratching around more and trying to fly a bit.They are starting to smell more by then too.This is a good point to talk about how often you will need to change their bedding.I use my nose for this one, about once a week is about how often we change their bedding.

Checking their food and water is important too. Checking it a couple of times a day works well. We put out smaller amounts of food so that less is wasted.We don't use the jar for the food and the little ones will sometimes poop in the feed meaning you wil have to change it if there's poop in it. Chickens in general drink lots of water so changing that is important.

Chicks are kept in their Brooder for 8 weeks and during that time you will need to raise the light up one inch per week.As the birds feather out they don't need as much of the heat and you are preparing them for outside temperatures.While the chicks are indoors you will know if they are warm enough by their movements. If the chicks are huddled together under the light they are either getting ready for nap time or they are too cool.You can move your box or lower the light a little bit. If the chicks are crowed at the end of the box where the light is not so intense they could be too hot.Again move the box around or raise the light.

Some other chick behavior that may surprise you is their sleeping habits.Chicks sometimes just fall over and are asleep.They fall asleep on top of each other or even in their feed bowl.Just like a baby who falls asleep sitting in their highchair,clunk they are out like a light.

At 8 weeks your chicks can go out to the coop to live.Some people choose to build the coop before they bring chicks home so it is already to go.Others build the coop during the 8 weeks they are raising the chicks.Either way make sure you are ready,the time goes by faster than you think.

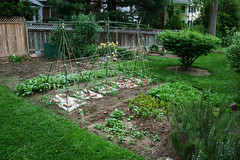
We are beginning to really get the spring chores rolling here.Yesterday we had soil delivered for more garden beds and some gravel for around our fire pit and under the clothes line.I planted 2 kinds of Swiss Chard and Sweet Peas and 3 kinds of Lettuce. The excitement is building here.My Dad was here the other day and has offered to teach us how to graft apple trees.I want 2 Gravenstein Apples and they are hard to find.My Dad's solution is to get some cuttings from a family friends trees and graft them.I am most excited about learning this new skill.It sounds easy and will add to our Homestead nicely.My Dad also brought us an assortment of seed potatoes for the garden.It's not too early here to plant them,we just need to get the bed built for them. Things are good and we are all happy and well.Not much could be better than that.
Rois


Reblog this post [with Zemanta]

Monday, February 22, 2010

And the winner is...........

A clothes-pin.Image via Wikipedia

Today is the day to announce the winner of my Clothes pin bag Giveaway and the lucky winner is..... Greendeva3. If Greendeva3 would please contact me I can send you your prize of one homemade Clothes Pin bag and one set of brand new clothes pins.
Thanks to everyone who posted.
Rois
Reblog this post [with Zemanta]

Monday, February 15, 2010

Garden Planning, Beds and Soil

spring vegetable gardenImage by woodleywonderworks via Flickr

Alright my last posting was about where to place your garden.Maybe by now you have had sometime to think that one over and you are ready to get down to the business of starting your garden beds. Since there are a few different ways to go about this I'll go over a couple of the most common ways to get going.But before I get around to digging and soil lets go over the garden beds themselves since you are going to need to know the sizes of your beds so we can talk about soil.

When we build new beds here at Hrafinstaad we don't worry about the length of a bed so much,we just fit the beds length to the space. But we do keep a fairly standard width to the beds,not measured just done by eye so we keep things looking a bit organic.We like to keep our garden beds from 32-40 inches wide or as wide as I can take a big step over.This is actually a gardening standard in many books.This width allows you to plant 3-4 rows of plantings,enables a person to easily step or reach across the beds and makes your work simple. This measurement is also true when building raised beds.
Now this is pretty straight forward stuff,this idea of straight lines but you don't have to make rows of beds,you can choose to make your garden beds any shape you want just as long as you keep one thing in mind and this goes for all garden beds so listen up here....ALWAYS have pathways or stepping stones for stepping into your work area.Set this thought in your head like stone DO NOT STEP ON THE SOIL YOU ARE PLANTING IN,you will end up with compacted soil that creates an unhealthy environment for both the plants and the thousands of little beneficial creatures,many of which are still unknown but are very important,that live in your top soil.

Finally when planning out your garden area take into consideration how far apart you want your beds to be, this is goes for those of you digging up a big area ,building raised beds or sheet mulching your beds. Our beds here in our front yard garden are wide enough for the lawn mower to mow the soon to be gone grass in between the beds but the beds in our back garden are spaced apart the width of two feet placed together.That is feet like the kind you put your shoes on.

Alright on to the soil part of planning your garden.If you are starting a brand new garden area you are going to need to tinker your soil a bit.That is if you are digging your garden otherwise for raised beds you will most likely buy soil to be brought in.

When purchasing soil for your garden you will need to know a couple of things.One being which kind of soil you want.Most companies that sell soil will have a garden mix made up of soil,compost and maybe some minerals.Call and ask the company what they have for gardens and what is in it.Also when you call you will need to find out how much soil you will need.The soil place should be able to help you figure how much you will need based on your bed size.

If you are digging up your garden area for the first time you will need to add a few things to get your soil going and ready. I recommend once your soil is tilled or dug and nice and fine to add around 30% compost.Now how you know you have that percent is learned through experience.Don't worry to much, trust your eye to tell you when you have it right.You can always add some fertilizer or mulch as a top dressing later to make it all work out. Once you have your soil worked lay out your beds the way you want them.

Back to everyone, I really suggest you wait a few days or up to a week before you plant in your new garden beds.This gives things time to settle in and start working as a new environment. Not only will your soil be happier you waited but I am sure your back will be happier too.Waiting also gives you time to map out your garden.

Chance and I have dug many garden beds over the years and it is a satisfying job. But this past Spring we tried Sheet Mulching for our front garden beds.We have a thick layer of gravel under our front yard and digging or tilling it was going to be a nightmare so we needed another option. I am not overly fond of raised beds,they do not seem natural to me.I like getting in there and really digging in the soil.I feel more connected to the Earth and not boxed in with beds. Sheet Mulching was a great alternative for us it has the ease of raised beds but I can still dig and work on rebuilding soil.

To Sheet Mulch is fairly simple,you will need sheets of un-waxed cardboard or broken down un-waxed cardboard boxes.The un-waxed part is very important,if the cardboard is waxed it will not break down. Lay the cardboard in the shape and size you want your garden beds. You can see Chance doing this here from last Spring.Now lay down a thick layer of compost,it can still be a bit chunky because it will finish composting later. Over the compost mound up soil about 8-10 inches high.Let the beds sit for a week or two before planting in them.The compost at the bottom will start to cook and will need to cool down a bit before you plant in it.Over time the beds will settle and no be as high.This Spring Chance and I will add some more soil to the beds we made last year.

There is so much information out about building a garden and how to care for the soil.It is a matter of how you want to go about it. Look around until you find a way that suits you and your wants. Rhonda Jean has been doing some great postings about gardening and dose a much better job than I, so I am encouraging you to go over to her blog and check things out. I am finding that I know all this information in my head,some of it based on science and some based on how I was taught by my folks but sorting it all out into useful information is proving to be tricky.I wanted to add a bunch of soil science bits to this posting but did not want to scare away anyone just starting out with gardening.

My work load at Urban Farm is settling down and soon will only be working 2 days a week.Cutting back on outside work will be good in the coming weeks,we have lots to do in the yard, build,plant , re organize and create. Wednesday we have company coming over for Chicken butchering and dinner. Our friends rooster has turned mean and needs to meet the soup pot. Spring is beginning to show her lovely self here.Our neighbors Willow tree is neon green with new growth, the spring bulbs are starting to bloom and in the morning I am greeted by the voices of the birds that have returned in full chorus.
Rois


Reblog this post [with Zemanta]

Wednesday, February 10, 2010

Planning your garden.

Spring is upon us,well almost,which means it is time to start planning for planting the garden.
There are many ways to get started,till,no till, containers,square foot,raised beds and many,many more. Once you have decided how you want to dig up your garden area it will be time to figure out all of the rest.

I really recommend spending some time out in your yard paying attention to a few factors. Sunlight,location and space . If you were farming there would be more to than just those 3 so count yourself lucky that you just want a vegetable garden not fields of crops.

The location...We have our garden all over the yard front and back with this in mind you can choose where you want your garden to be.I have really enjoyed having my garden right out my doors for quick easy picking and a lovely view. Maybe because of space you too will need to think about having garden beds where ever you can find space. Who says that a garden HAS to be all in one spot when you have good sun in a couple of places? Some people who live in rentals use the existing flower beds as their garden,we have and you would be surprised how much can grow in a little bed. Some is better than none.
Next dose the space you are considering get enough sunlight? A full 8 hours of full sun is perfect but my back garden gets 5-6 hours worth and is just fine. When we first planned our back garden I realized if I moved the garden over by 3 feet I would get more light,our back fence shades the one side of the garden.(This shady area that was going to waste is where we ended up building our chicken coop. More about that soon.) Dose the area have a shaded side? You can plan to plant veggies that don't need as much full sun in that area. Lettuces don't like the heat so planting them on the shady side can enable you to grow or have lettuce longer into the summer heat. Also knowing which way the sun crosses your yard is helpful. An old trick to figure this out is to put some tall sticks(2-3 feet long.) a few feet apart if the space is large in a row that follows the path of the sun,you can then use the sticks much like a sundial but you are watching to see where the shadows are. This will help you to plan where to plant what. For example you don't want to plant some thing that is going to be tall like tomatoes in front of something shorter that likes the sun just as much as the tomatoes do. And don't forget to take into consideration the trees around you. Are they currently bare of leaves? Will they leaf out and make more shade than you want? If the tree belongs to you is it in need of some pruning which would give you the sun you are needing?

How much space you need overall is up to you and how much you want to plant and how much time you have. The bigger the garden the more time you will need. We started out with what I consider a medium sized garden when we first moved here but over the years have added to it. Adding more later I think is a good approach if you have never gardened before.It allows you to explore wither or not you like to garden,have the time or wither or not you chose a good location.

When planning the amount of space you will need take into consideration what you will be growing and how. Many vining plants like cucumbers or squashes can be grown vertically on a trellis which is great way to maximize your growing room. Green beans can be grown either as a bush or as a vine depending on the variety you choose again saving space for other things. Read up on what you want to grow and the space each thing will need. Radishes are compact but pumpkins need room to roam and are better off away from the main garden,trellised or along the edges of the garden where it can freely spread.
Alright then, you stood out in your yard got a good idea of sun and location now you are ready to dig. But are you ready to dig? Did you spend a few different times out in your yard? The weather and sun are unpredictable,one cloud can change the view of what you thought was "The Spot". Was it a cloud or a tree causing that shade?Have not seen the sun in days? Go back out the next sunny day and look again. Digging a garden is big work; who wants to regret where they dug?
How you dig and prepare your soil for planting is another posting coming soon.I will also add into that posting how to choose your seeds.

Life here is settling into a better routine. Chance is no longer working 3 evenings a week,freeing up more time for projects and family.My body has mostly adjusted to the heavy work I am doing at Urban Farm Store,give me one more week and maybe my muscles will have forgiven me. I think I am bringing home Chicks this Friday.I am still chewing that over,wait VS don't wait,we shall see.
Rois

Sunday, February 7, 2010

Giveaway by yours truly

I am happy to announce my very first Giveaway! To inspire you to hang your clothes out on a line I am offering this spring themed Clothes Pin/Peg Bag made right here at Hrafinstaad by Yours Truly.The bag will include a set of wooden pins/pegs to make it complete.

To enter please post a comment telling me why you read my blog and what keeps you coming back for more.Sign up as a new Follower and you will get double chance's in the drawing.

The deadline for entries will be Sunday February 21 st by 9PM.I will notify the winner on Monday February 22nd.

Good Luck and now let the Giveaway begin!

Rois

Saturday, February 6, 2010

Where to begin

germinationImage by pkingDesign via Flickr

I think I have myself figured out, at least for now. I was feeling as if my blog was a bit disorganized and a jumble of useless stuff which is not what I want. Looking things over and sorting out my thoughts I had the feeling that some how I had started my blog in the middle of the story.So I am going to do a bit of back tracking and start more towards the beginning.

I already wrote about my childhood and how I came to realize that I am a second generation "Urban Farmer" so I am going to skip ahead to the years when we first got serious about growing our family,our food and chickens. " Where do I start? " is a common question folks have about the kind of life we live so maybe by back tracking I can help you to get going on your own.

I am going to start at the spring Issac was 4 and Sol was just 1. That was the spring I really brought Issac out to share in the work of planting a garden. Sol mostly watched that year but he was there with us. In our family everyone is included in whatever is going on,it makes everyone's lives richer. Issac helped me plant the seeds and seedlings,carefully tucking each thing in with a little whisper "See you soon little brother." Issac then helped from then on with the watering and weeding.Issac's nick name is Hawkeye because he has the eyes of a Hawk,he always spied the new little shoots first with a smile on his face.

Later in the summer as we ate some green beans from the garden Issac found a seed inside one of the beans on his plate.He got so excited,ran out the front door and planted that bean in a crack along our front walk way between the grass and cement.I did not have the heart to tell him it would not grow.Issac carefully watched for his bean to grow like the ones in the garden and would not let Chance mow the grass there. My Mom did a wonderful thing one day while we were out,she stuck a bean seedling right in Issac's crack to keep the magic going. "I told you it would grow." crowed Issac with glee. Those are the moments you live for as a parent.You pass on to them your passion and knowledge hoping they will get and keep it,then one day you see for one shining moment they got it and are holding it close like a treasure.

Many years went by like that one,the boys grew and as they grew so did their knowledge of gardening and harvesting the fruits of our labor. It became pretty standard here that at lunch time during the growing months, I'd call in the boys for their lunch I'd ask them "What shall we make for lunch?" Issac," We already ate." Already ate,I thought they were safely playing in the back yard digging to China,an endless task and I always prayed the hole would not cave in on them but I was not one to squash fun. "Ya, there were beans and tomatoes in the garden and we drank from the hose.Can we go now?" What Mother could complain? My kids were eating by choice their veggies and I had one less thing to do. Another shining moment when I knew my kids were set on the path of becoming "Urban Farm" kids.

Finally 7 years ago we added our first flock of Chickens.That was exciting and we were ready to take another step forward.The boys were in school full time by then and had been helping Papa with the feeding of his Chickens and gathering of eggs for a few years,they knew what to do and were happy we would have our own tub of Chicks in the kitchen corner just like at Papa's.

My next posting will be about planning your garden and the following post will be about raising Chicks. It's time to stat planning,the seeds are out,the days are growing longer and the Chicks are arriving in the Feed Stores.

Monday I will be working at the Urban Farm Store again and there will be Chicks in.So I am going to make my promise to Chance right here for all of you to witness.
I, Rois will NOT bring home any Chicks from work. Unless Chance is standing right there and gives the OK. Cross my heart and pinky swear it.

Rois
Reblog this post [with Zemanta]

Thursday, February 4, 2010

I am taking a break from writing.My thoughts keep leaving my head before I can get here to write so maybe I need to step back and just think for a bit. I have been writing for close to a year now, I think it is time to sort out where I am going and what I want this blog to be in the coming year.
Margaret if you are reading this do you have a Goddess for writer's block?

Rois